Gate Control & e-Ticket Validation - Easy & Secure Ticket Scanning (QR-Code & Barcode)
How to admit patrons to your event professionally and in
style
Goal:
The purpose of gate control is to validate tickets at the
gate and admit valid tickets to your event. It should be fast, professional and
able to accurately distinguish valid, invalid and duplicated tickets. The
faster the process, the shorter the wait time at the door and the more
organized the event.
Traditional methods:
Traditionally, tickets are printed in a print-shop on
regular papers. Since most of these tickets lack secure duplicate prevention
methods, they are subject to fraud. They can easily be copied and duplicated, using any color printer and copier.
Unlike traditional tickets, e-tickets are more secure and
protected by securely generated barcodes that makes duplicating them very hard
if not impossible.
Concept:
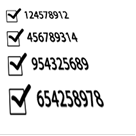
 To accomplish the ticket validation goals, each e-ticket generated by Ticketor has a
securely generated numeric barcode and QR code. The numeric value for the barcode is also printed right beneath the barcode.
To accomplish the ticket validation goals, each e-ticket generated by Ticketor has a
securely generated numeric barcode and QR code. The numeric value for the barcode is also printed right beneath the barcode.
In simple terms, the gate keeper is responsible to check
this numeric value against a list of all valid codes for the event and as each
e-ticket is used, check the code off the list.
Invalid Ticket:
If the code on the ticket does not exist in the list, it means
that this ticket is not valid for this event. It could be a ticket to another event or performance or may be generated fraudulently.
Duplicated Ticket:
If the code on the ticket exists in the list but is already
checked off (marked as entered), it means that the ticket is duplicated fraudulently and
access to the event should be denied.
Solutions:
Ticketor offers different solutions to accurately and professionally
validate the e-tickets and admit patrons to the event. Best solution for your
event depends on the size of the event, number of gates, availability of the
internet at the gate and your budget.
1.
 Printing
Admission List – Most simple solution for small events
Printing
Admission List – Most simple solution for small events
o
Maximum size of the event: 150 person
o
Estimated cost: No cost
o
Maximum number of gates: 1
o
Internet Connection at the gate: not
required
This is the most basic method that works for small events.
You can use the “Delivery Reports” section of Ticketor to print the “Admission
List” and take it to the venue. The gate keeper has to verify each e-ticket
against the list and mark each admitted ticket to catch the duplicates.
The sale should end sometime before you print the admission list.
2.
 Using a Smartphone, Tablet or Laptop with an optional
Bluetooth or USB Barcode Scanner (MOST POPULAR and recommended for almost any
events)
Using a Smartphone, Tablet or Laptop with an optional
Bluetooth or USB Barcode Scanner (MOST POPULAR and recommended for almost any
events)
o
Maximum size of the event: unlimited
o
Estimated cost: A smart phone or
tablet (starting at $50) and optionally a Bluetooth (starting at $70) per gate
o
Maximum number of gates: Unlimited
o
Internet connection at the gate:
Preferred – If not available, offline validation should be used
In this method you can use a smartphone, tablet or laptop (we will call it the "device" going forward) and an optional Bluetooth or USB barcode scanner
You will use either the device camera or an external barcode scanner to read the barcode or the QR code. Then the numeric code is transferred to the device for validation.
The device communicates with Ticketor's server through internet to validate the ticket against a central list and shows the validation result on the screen. This method ensures that all gate control devices validate against a single, central list and they are always in sync. Moreover, they have access to the most recent information which means you can keep selling tickets, adding new tickets, making returns even after you open the gates and the devices accommodate for all the updates. (for offline validation options, in case there is no internet access at the gate, continue reading)
Reading the code
- You can use an Android or IOS device with a high quality camera in conjunction with our "Ticketor Gate" app from the Google Play or App Store to read the barcodes or QR codes. Using a phone camera as the sole method of scanning is not recommended for large events since the camera may be slow in focusing and scanning tickets. The quality and speed varies depending on your camera and if the camera supports auto-focus. You probably will experience faster result by scanning QR codes rather than the barcodes. Scan a few tickets before the event to make sure your phone and camera gives you the speed you require.
- You can use an external barcode scanner to scan the tickets faster and more professionally. The barcode scanning device will read the Barcode or the QR code faster and from a longer distance, then transmits the numeric code to your device using either Bluetooth or USB. If you are using an external barcode scanner, you really don't need high-end devices and can do validation using very affordable low-end Android phones or tablets. In this method, you can either use our Android or IOS app, or you can use any browser on any type of device (Windows, Mac, Chromebook, etc.)
You can buy a barcode scanner or a barcode scanning device from Ticketor's store.
Some notes:
-
Cameras can scan both from the paper tickets or buyer's phone display.
-
Cameras have better performance scanning QR codes then barcodes.
-
Most Barcode scanner devices, can scan both from the paper tickets and buyer's phone display. Check with the specification if yours can read from the display.
-
Barcode scanner devices, come in 1D (1 dimensional) or 2D (2 dimensional) variations. 2D scanners can scan both barcodes and QR codes while the 1D scanners can only read barcodes. You may get faster result with 2D scanners.
Instruction:
-
Install the app:
If you are using an Android device or IOS device, install "Ticketor Gate" app from Google Play or App Store . Alternatively or if you are using any other type of device, download and install the latest version of Firefox or Chrome.
Note that if you want to scan with the camera, you need the app and cannot use camera with a browser.
-
Connect the barcode scanner device (skip this step if you are planning to use camera)
When you connect a barcode scanner to your device, it functions like a keyboard. It reads the barcode, and sends the code to your device as if it was typed on a keyboard. While a USB barcode scanner sends the data through the USB wire, a Bluetooth scanner sends the value wirelessly through the Bluetooth signals.
Almost all smart phones and tablets support Bluetooth and can be used with a wireless Bluetooth scanner. Some laptops and most desktops may not have Bluetooth functionality and may need a Bluetooth adaptor or can use USB scanners. On the other hand, most smartphones and tablets (even though they have a USB or micro-USB port) cannot use a USB barcode scanner.
For USB scanners, you just need to plug the cable to a USB port on your device and it should work automatically. Bluetooth barcode scanners need to be paired with the device. The pairing process is similar to pairing a Bluetooth hands-free. The process is usually to put the barcode scanner in pairing mode, then using your device search for Bluetooth devices, select the barcode scanner among the result-set and click on the pair button. The device may ask you for a pin that should be entered on the device and the barcode scanner before the pairing completes. You need to pair only once and as soon as the device is paired with the scanner, they can work together. If you are using multiple devices and scanners for multiple gates, make sure to mark your devices so you know which scanner is paired with which device.
For more information on pairing the Bluetooth scanner, refer to your scanner and device user manual.
In order to test if the scanner is connected to your device, just open a text editor or any application with a text field, click on the text field to make it active and then scan any barcode. The value of the barcode should appear in the text field.
-
Use the scanning app or web page
-
If you are using the Ticketor Gate app, launch the app. Otherwise launch the browser and go to your site and then "Control Panel > Events & Venues > Gate Control"
The app and the gate control web page work similarly except that the web page cannot use the camera.
-
Your browser may ask that "This website is trying to save data to your device". Make sure to allow the data to be saved. It will let you browse to load this page even when you are not connected to the internet.
-
If you are not logged in, you will be asked to login as an administrator, event organizer, or gate controller. If you login as an administrator or gate controller, you will be able to perform gate control for all upcoming events but if you login as an organizer, you will only be able to access your own events.
-
On the next page, select the event that you want to prepare for gate control.
-
If you will have access to internet (Wi-Fi, 3G, 4G, etc.) at the gate select "Online" for validation type (recommended) otherwise select "Offline" and read more about offline gate validation below.
-
Proceed to the Gate Control page. On website, click on "Download data" before proceeding to the gate control page.
-
Scanning:
-
Enter the barcode manually: Tap the Barcode text box to activate it. Using your device keyboard, manually enter a valid or invalid numeric code and hit enter.
-
Use external barcode scanner: Tap the Barcode text box to activate it (the box should be selected for the borcode scanner to scan properly). Scan the barcode using the connected barcode scanner. The value should appear in the barcode box and validated immediately. You don't need to hit the enter key or touch the screen.
-
Using the camera: In the app, tap the camera icon. Then hold the QR code (preferred) or the barcode in front of the camera. Hold it for a couple second till the camera focuses and scans the barcode.
As soon as the reading of the code is done, the value is send for validation and you should see the result as either a red or green box representing the validation result. If the ticket is invalid, you will see a pop up that you need to close before scanning the next ticket, otherwise you can keep scanning the next ticket without touching the screen.
If the ticket is valid, it will show in a green box and your device will make a success beep, if not the result will show in a red box, the reason for the failure will pop up and your device will make a failure beep.
Avoid touching the screen for continuous scanning. Keep scanning without touching the screen unless you get an invalid ticket.
Find the best distance from either the camera or the barcode scanner to the ticket. If the ticket is to0 close or too far, it may not get scanned.
Other app features:
-
Exit for re-entry: If somebody needs to leave the venue to come back again, you can switch to "Exit for re-entry" mode and scan their ticket. It will mark the ticket as "not entered" so they can use the ticket again when they come back.
-
Search by name, email or confirmation number: If the patron does not have their tickets on them, you can look up and admit their tickets by name, email or confirmation number. Switch to the "Name/email" tab and enter a few letters of the buyer's name or email, then select the buyer from the auto-complete list and click on "Find Tickets". Or switch to "Confirmation Number" tab and search by their confirmation number. If the tickets are found, you may then want to verify the buyer's identity to make sure they are the actual buyer (owner) of the ticket. Then click on each ticket number to admit that ticket.
-
Status: Click on the status button to get the latest status of tickets sold and admitted.
-
Buyer detailed information: Click on any validation result box, to see more details about the ticket, buyer and purchase information.
Behind the scene / Fast primary result / Emergency network outage
As soon as you go to the gate validation page, the device communicates with the server and gets the latest version of valid codes and if they have entered or not. Anytime you scan a new ticket, the server sends the newest update to your device. So your device keeps a copy of the latest version of the admission list at all times.
Fast validation: Anytime a code is scanned, the device performs a primary validation using the copy of the data it has locally and instantly shows the primary validation result. The primary validation result is shown in light-green or light-red. Then the device contacts the server for the final validation result and changes the validation result to either green or red. On a regular network, it happens so fast that you will not see the primary validation result. But if the network is slow, you can pretty accurately rely on the primary result.
Emergency network outage: If the network goes down, and you need to keep scanning, you can scan using the data that is locally available in your device. The list can accurately verify the ticket validity and can detect duplicates to some extent.
Offline validation:
If you don't have access to reliable internet at the gate, you can still use the gate control system with some limitation.
In the gate control app (preferred) or website, after you select the event, select "Offline" as the validation method.
Select the "Number of gates". All devices should have the same value.
Then select the gate number that each device scans. For example, if you have 3 gates, one device should be assigned to gate #1, one device to gate #2 and one to gate #3. Label each device with the gate number.
If you have more than 1 gate, since the devices cannot communicate through the network and so there is no central list to be used, each gate should only admit a subset (a range) of tickets so that duplicates can be identified. To achieve that, each subset of patrons MUST enter from a specific gate. On the e-tickets and beneath the barcode there is a value starting with "G". This value ranges from "G1" to "G10". As you select the gate number, the system will tell you which G values are being admitted by this gate/device. You should make signs that explain which gate each person should use to enter based on the "G" value on their ticket. So gate 1 may only admit G1,G2, and G3 and other gates admit the rest.
Click on "Download data" button to download the list of valid barcodes to your device.
Notes:
- Make sure to download/refresh data after all modification (add, update, delete) to the tickets are done. If you happen to need to add/delete tickets after you downloaded, you need to come back to this page and refresh the data. Selling tickets is OK and you can continue the sale after you download the date.
- If you are using offline method, do not reload data after you start scanning tickets. The entries information will be overwritten and so the duplicate tickets may not be caught.
- If you are using offline method, Returns and Refunds should be disabled after you download the data.
Best practice at the gate:
For medium and big events, where you expect a lot of audience to show up at the same time, speed is very important. One person with bad or forgotten tickets or the tickets that do not scan or validate, may hold the line for several minutes. It is nice if you can have somebody with a bigger tablet who can handle the special cases. If the gate controller cannot scan the tickets, they can simply move the person to that special line and keep the line going.
Scanning with one hand:
The recommended Bluetooth scanners are designed in a way to easily get attached to the phone. You can use a double tape such as Scotch® Reusable Tapes to attach them to the back of your phone.
For other scanners, you
can hold the scanner in one hand and keep the smartphone on a shelf, in your pocket or
hanged on your chest. You will hear the audible beep and if you hear an invalid
beep, you will need to take a look at the screen. In this scenario, we
recommend using a headphone in case the environment is too noisy.
Compatible Barcode Scanners:
Any Barcode scanner that can connect to your device (through USB or Bluetooth) and can work in HID mode and can scan CODE-128 barcodes and optionally QR codes can be used with Ticketor.
HID (human input device) mode, means that the Barcode scanner can work as a keyboard and enter the barcode in any text field.
The best practice is to use a Smartphone as the device. In that case, make sure the Bluetooth barcode scanner is compatible with your device. They should specifically mention that they are compatible with IOS or Android.
2D (2 dimensional) scanners that are capable of scanning QR codes, give you the flexibility to scan either the Barcode or the QR code and may scan faster.
How to purchase or rent the devices:
If you need consultation on the brand or devices or want to
purchase or rent your devices from us, please check out Ticketor Store or email us at Sales@Ticketor.com.